Wednesday, March 31, 2010

Border Wars

Back before the 'time of great cleaning', last month, I was working on a quilt.


This quilt.

I had the blocks sewn together and one border cut and pieced together when things were packed up and put away in the name of de-cluttering.

And so, remembering my resolve to finish the current project before the next one is begun, today I got it down from the shelf in the closet and put the border on. Then, I remembered that I had intended to have an inner border... So, I took the first border off. After cutting the inner border, I remembered from my class that if more than one border is to be mitred, they should be sewn together and mitred at the same time.

So that was the plan. Except with the inner border added, the outer border was just a bit short of long enough to mitre. Which I didn't figure out until I was mid-mitre.

Well, then. I would not mitre the corners. Un-doing and re-doing was much harder than you would think. Or that I would think. And it is a pretty big quilt top, so there was much wrestling of fabric. I had to stop after three corners. And to illustrate how taxing to my brain, the whole 'figuring out' process was, I thought I had stopped after two corners!

I finished it up this evening after my yoga class restored my mind/body connection.

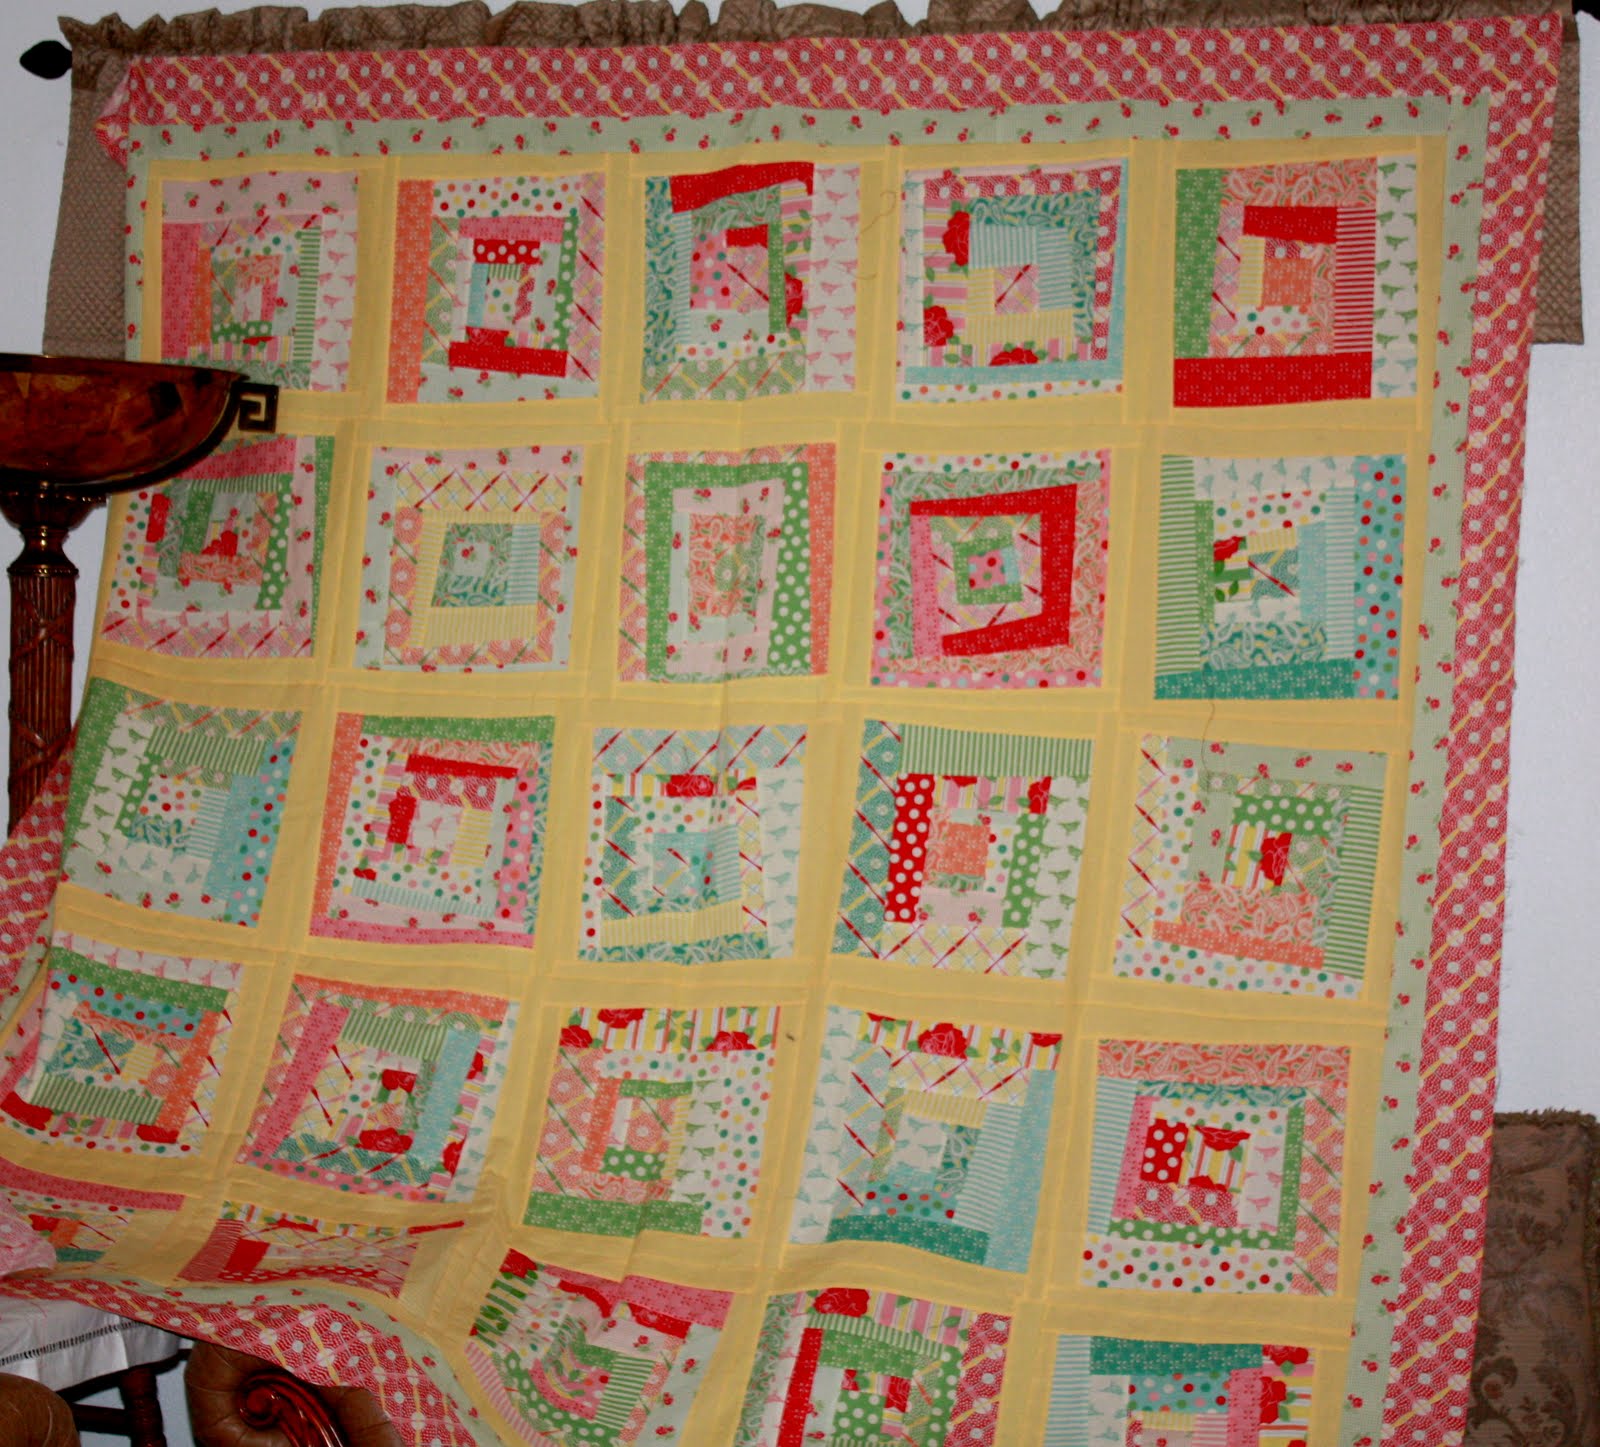
This is what it looks like with the borders. (After taking down the ugly valance and re-arranging the furniture, my 'design wall' is not quite as effective as it was...)


I am not sure I am completely in love with the effect. I think that maybe the inner border should have been narrower. Or maybe it needs another border - maybe a yellow one - added to the outside. Or maybe binding it with the yellow is just what it needs.

I don't think I have it in me to take off the borders and try something different. I might change my mind after a day (or ten) away from the project, I suppose. At this point, I think I will leave it as is and use the yellow for the binding.

But, if anyone has any suggestions, I am open...

Sunday, March 28, 2010

Embroidered Hands & Feet

Last fall, my dear niece (and sometime guest blogger) K, attended the wedding of her good friend and former coworker. The bride (K's friend) and the groom are both Indian with many ties to that country and culture so the wedding was very different than any that I have ever been to.

K's description of the event (which occurred over several days) and the many photos she took, opened a tiny window into some very fascinating and beautiful traditions.

One custom that has never been a part of any of the weddings that I have attended, was the henna. I am not sure what part the henna designs play in the big picture. Maybe it is similar to the bride and her attendants all getting their nails and hair done, or maybe the process and designs are mystical or religious. Perhaps someday K will share the back story with us, but for now, I will share a few photos:


These are the bride's forearms...
(Doesn't it remind you of a fabulous piece of embroidery work?)
And this is the bride's ankle.


K also had henna on her hands.
This is after it is first applied...
This is what it looks like later, after washing, I am assuming.

On one of the pre-wedding trips to India, K's friend had some outfits custom tailored, so that K and her Manfriend, would not feel out of place at the festivities. She brought back several outfits for K to wear to the various events and Mf wore a traditional outfit with the most fabulous shoes, highly decorated with square toes that kind of turned up.

When we were visiting K last month, we got to see her outfits 'in person'. They were all highly embellished with fabulous beading and embroidery and just gorgeous! She mentioned that she had been looking for something to protect them from dust and I offered to make her some muslin garment bags.

This weekend, I decided that I had better make good on my promise!


This will go out in the mail to her tomorrow. I used the henna design from the palm of her hand as inspiration for a bit of embroidered trim.


I enlarged it from the photo, which compromised the quality quite a bit, so the detail is pretty vague, but I was pleased at how the stem stitch and outline stitch mimic the henna as it was first applied. I used a combination of two browns to get closer to the henna shade.

In some of the photos, I could see some patterns that the henna 'technician' used. I am thinking I might have to try to find some of those patterns...

Wednesday, March 24, 2010

More Learning!

On Saturday, after the quilt show, I stopped by the lqs to take advantage of the 'show specials'. They were offering a free spool of thread with a $5 purchase. How could I pass up free thread?

I also signed up for a paper piecing class! Tuesday evening, I took my big bag 'o quilting supplies and spent a couple of hours learning the art of paper piecing.

These are the two blocks that I made. (The fabric came in a kit as part of the class fees.) We made one block with regular paper and the other with vellum.

The block is not a very complex one, so easy to learn. I am not sure it will be a favorite, but a good technique to have in the bag of tricks, I suppose.

Since the fabrics are quite different, I will have to think of something to use these blocks individually, I suppose.

Maybe everyone will get hot pan holders for Christmas this year!

Sunday, March 21, 2010

Tiny Inspirations!

This weekend, I attended the Desert Quilters of Nevada 20th Quilt Show. The show was called "New Beginnings" and there were over 250 gorgeous quilts entered.

There were all variety of quilts for walls, beds, dolls and for wearing, but the ones that charmed me were the miniatures.

There were many small quilts entered and 24 mini quilts were auctioned. These are some of the auction entries:


Christmas Stitches by Marjorie Stanbridge

This small Christmas quilt was entered in the show, but the quilter who made it, made another for the auction. It measures 9" x 10".

Neon Showers by Georgi Shalhoob

This one was a bit bigger, about 10" x 12", I believe. It has over 900 beads sewn into the green spots.

Cottage Fans by Karen Bristow

This one was so charming, I almost bought the pattern from one of the vendors. But then I remembered all the charming patterns I already own, and refrained... I think this one was about 12" x 14".

Victorian Bluework by Karen Bristow

This one was saved for the end of the auction. I didn't stay to see how much it went for, because I didn't have a sweater and I was getting really cold. But there was a lot of buzz about it during the preview, so I know that it probably went pretty high. It was really lovely, bigger than the others at about 12" x 14". The embroidery was exquisite, the detail was perfect, as most of it was stitched with one strand of blue floss.

I was really inspired by seeing all of the wonderful quilts. Not all of them were to my taste, color wise, but all were interesting.

I joined the guild at the show and I think I might try to join one of the circles. All but one of the fourteen circles meet during the day, on week days, so I am guessing that many are probably retired ladies, but one circle meets in the evening and it is not too far from me, so I think that I will see what they do.

Who knows, maybe next year I will have finished a quilt that I can enter!

Friday, March 19, 2010

Vintage Fabric - Fresh off the bolt!

One of the destinations on our recent trip to New York City, was the Brooklyn General Store. Dear Sis found reference to it somewhere and did the research and it turned out that it was not too far (or too many subway stops, at least) from where we were staying, so that was on the agenda for day one.

Luckily, because day two was kind of washed out due to a combination of colds, fatigue and parking challenges.

Brooklyn General is a very old storefront, with old fashioned fixtures and furnishings, but also very modern selections of all things yarn-ery, embroidery and fabric. They also have some lovely (but VERY high-end) wool blankets - nothing that I would dream of cutting up to make a coat! They also had some wonderful wool socks, that came in different sizes (because feet are not all one size!)

DS carried her camera that day, so I didn't take mine. She has posted a photo

here, of us with Mary, a 'previously unmet' friend from Snitnknit, who took some photos of the inside of the store (and posted them here

).

In my opinion, Brooklyn General Store provided the ultimate souvenir of New York City!

Fat quarter bundles of 'new old stock' vintage fabric.

I had a terrible dilemma! Should I buy the fat quarter assortments (five fq's for $20) or yardage straight off the bolt!?!

Yes, they had bolts of vintage fabric!

Really beautiful vintage cotton!

They were originally from a store on Long Island. The original price was less than 25 cents a yard, if I recall. These days, the price is $20 a yard. At first, I thought that I would buy three or four half yard cuts of a few of my favorites, but I couldn't narrow it down to just three or four...

This was one of the faves, though. It is not a large print, the photo is a section about 8" across. I didn't even notice the people and the houses until I took the photos!
This was another favorite. The photo shows about 6" of the print.

I love the combination of grey with the other colors.

So then I noticed the blue and grey fabric and the grey 'animal print' spots with the yellow flowers and I decided to get an assortment of fq bundles. The price 'per yard' was a bit less with the bundles, anyway, and you know how I am about a bargain!

I bought three bundles and two pair of the fabulous wool knee high socks.

Between the three bundles, I ended up with multiples of the prints in the top row of the photo and just one each of the others.

Even though $16 a yard is not a crazy price for vintage fabric, calling it a souvenir made it a lot easier to splurge.

But now, I am thinking that I might ask Ms A if she planned to be in that neighborhood again, any time soon...